How to Build an AI Influencer: The Complete 2026 Guide
A step-by-step walkthrough of designing a persona, generating consistent reference images, building a wardrobe library, and shipping content that actually looks like one person made it.

There is a version of "build an AI influencer" that takes 90 seconds: type a prompt into an image model, post the result, call it a persona. There is also a version that produces a feed people follow and trust enough to buy from. This guide is about the second version.
The gap between the two is not talent or luck. It is structure. If you treat the persona as a small, well-defined system (an identity, a wardrobe, a photography register, a voice, a posting cadence) every step downstream gets easier. If you skip that work, you spend the next six weeks fighting drift and wondering why engagement is flat.
Below is the full pipeline, end to end, written from inside an AI influencer platform we have spent the last year building. No shortcuts, no over-promising, and where there are real tradeoffs we will name them.
What an AI influencer actually is (and isn't)
An AI influencer is a fictional character whose photos, videos, and captions are generated by AI but consumed on the same platforms as a human creator. The novel part is not the rendering. Diffusion models can paint a photoreal face in a second. The novel part is continuity: making a thousand of those photos look like one specific person, living one specific life, with one specific voice, over months of posting.
What it is not:
- A face generator. A persona is a system, not an asset.
- A deepfake of a real human. Ethical AI influencer work is fully fictional, no real person's likeness is used.
- A replacement for editorial judgment. You still decide what the persona stands for, what they post about, and which collabs they accept.
- "Free content forever." Compute, review, and iteration cost real money and real attention. The savings come from leverage, not from zero cost.
The mental model that works best: think of the persona as a brand, with you as the editor-in-chief. The AI is your studio, your photographer, and your stylist, but you are still calling the shots on identity and tone.
Step 1: Define the persona
Everything cascades from this step. A vague identity produces a vague feed. A concrete one produces a feed that feels like it belongs to a real human.
The five fields that matter most, in order:
- Age. A specific integer, not a range. "27" generates a different person than "late twenties."
- Build. Body type and proportions in plain language: "lean runner's build," "athletic and broad-shouldered," "soft and curvy."
- Ethnicity. Be specific enough that the model has something to lock onto: "Korean-American," "Afro-Brazilian," "Lebanese with green eyes." Vague ethnic descriptors drift the most.
- Subculture. This is the cultural pocket the persona lives in: "downtown skate kid," "Bay Area startup engineer," "Lisbon expat creative." Subculture does more work than wardrobe, because it implies the wardrobe.
- Signifiers. Three to six small, specific tells that anchor recognition: a freckle pattern, a stack of three thin gold rings on the right hand, a particular pair of glasses, a chipped front tooth, a small wrist tattoo. Pick details a casual viewer would not consciously notice but would unconsciously use to recognize the same person.
A useful way to keep this stable is to write it once as a structured identity sheet age, build, ethnicity, subculture, signifiers and reuse those exact fields in every downstream prompt. You can do the equivalent in a Notion doc as long as you commit to it and never edit it casually mid-campaign. Drift in the source-of-truth is what causes drift in the feed.
Counterintuitive tip: do not over-describe. Six well-chosen signifiers beat thirty mediocre ones. The model has limited "attention budget" per prompt, and adjective stuffing dilutes the strong cues.
Step 2: Generate consistent reference images
Once the identity is locked, the next job is to give the image model a way to see this person from any angle. Text alone will never be enough. Two prompts with the same description will produce two visually similar but distinct people. We covered the why in detail in our piece on the visual consistency problem; here we will focus on the how.
The minimum viable reference set is four neutral-pose, neutral-lighting shots:
- Front (camera straight-on, eyes to camera, neutral expression)
- Three-quarter left (body and head turned ~30° to the left)
- Three-quarter right (mirror of the above)
- Back (full back of head and shoulders, same lighting)
Why all four? The face you see at three-quarter is not just the front face rotated, the visible facial geometry, ear shape, hairline, jaw line are all subtly different. If your reference set is "front only," every three-quarter generation becomes the model's best guess. Best guesses drift. With four anchored angles, the model interpolates from real geometry instead of making it up.
A few rules that have saved us a lot of pain:
- Identical lighting and background across the four shots. Studio gray or soft daylight. This isolates identity from styling, which means the embedding learns the face, not the lighting.
- Neutral expression on at least one shot. Smiles distort facial geometry, useful for production photos, harmful as a reference anchor.
- Re-render, do not reuse, photos of real people. This is the ethical line and we treat it as non-negotiable.
- Save the seed. Whatever stack you use, capture the exact parameters that produced these references so you can regenerate or extend the set later.
If a step in your pipeline is "pick the best of ten generations," that is fine for production photos but a trap for references. References should be deterministic. You want to be able to recreate them in six months.
Step 3: Build a wardrobe library
The face stays the same; the wardrobe is what makes a feed feel lived-in. A persona with one outfit looks like a video game NPC. A persona with forty looks like a stylist's mood board. The sweet spot is four to six outfits, each tied to a clear occasion.
For a fashion-forward urban persona that might look like:
| Outfit | Category | Occasions |
|---|---|---|
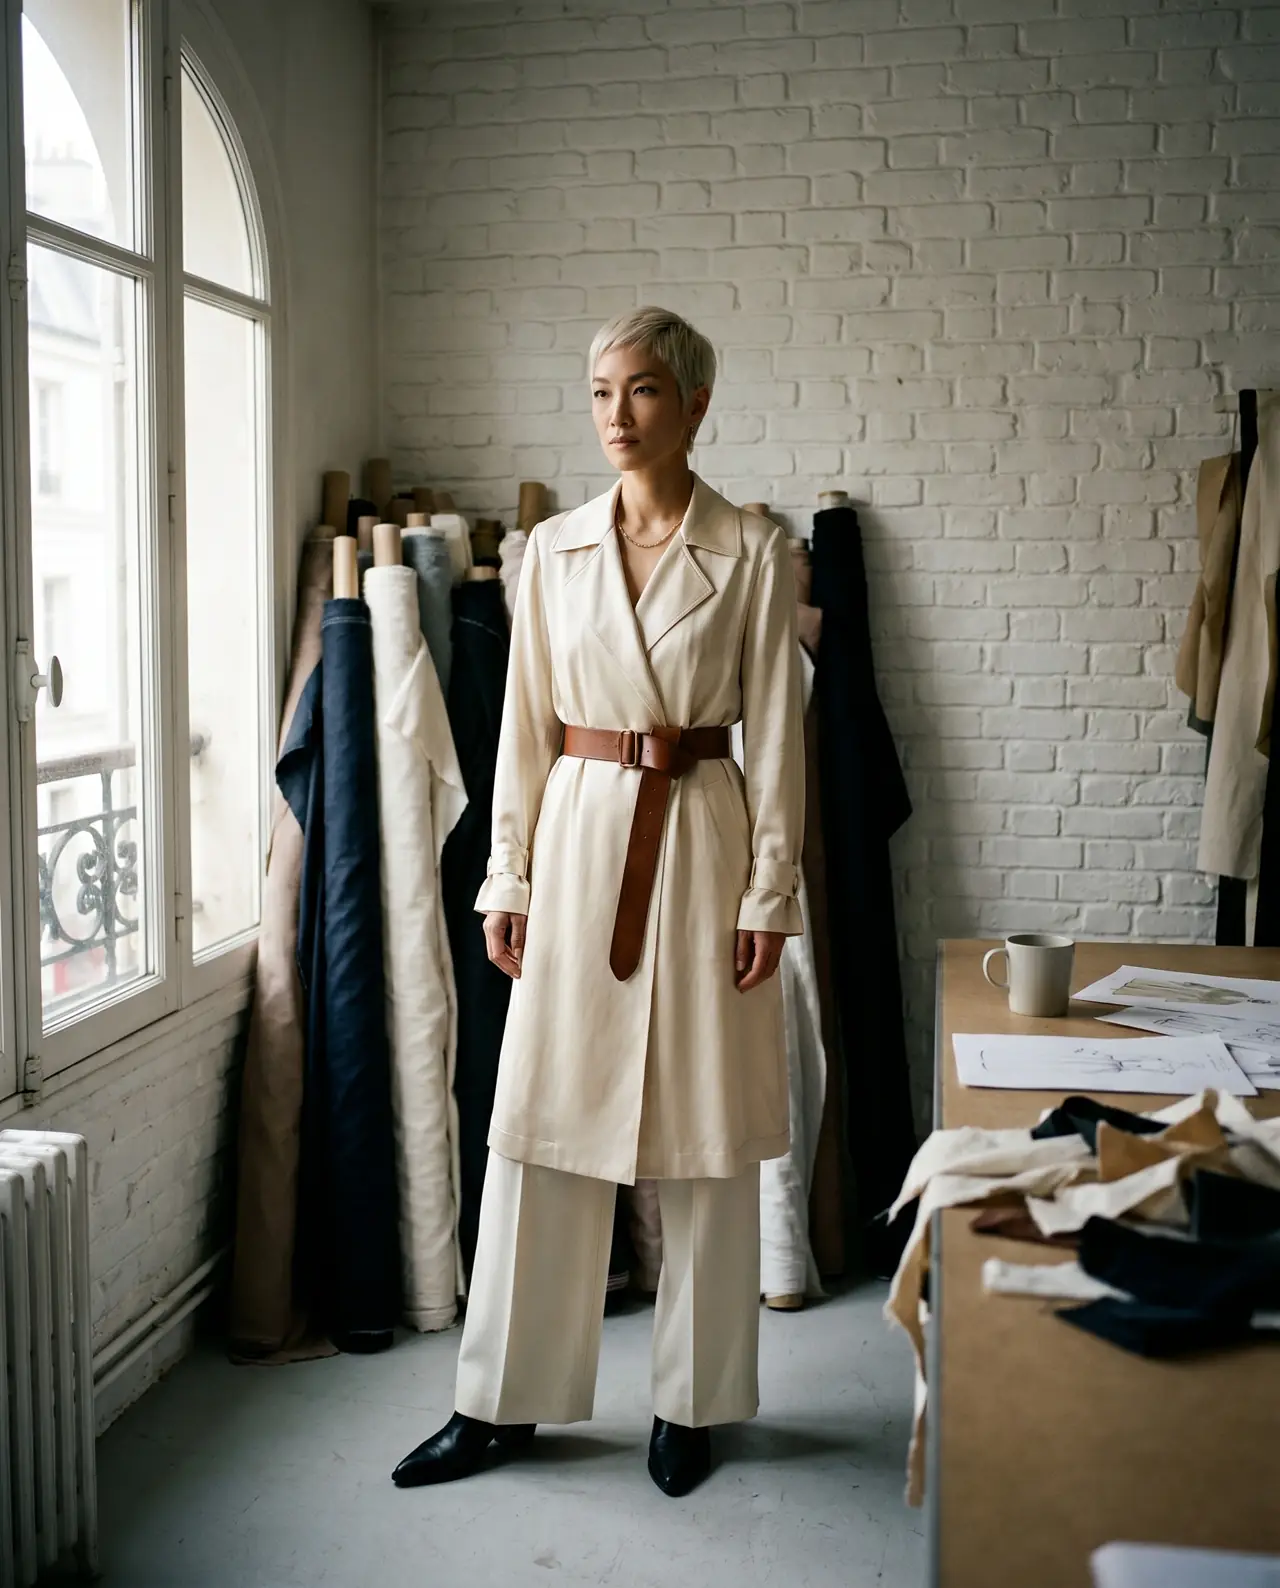
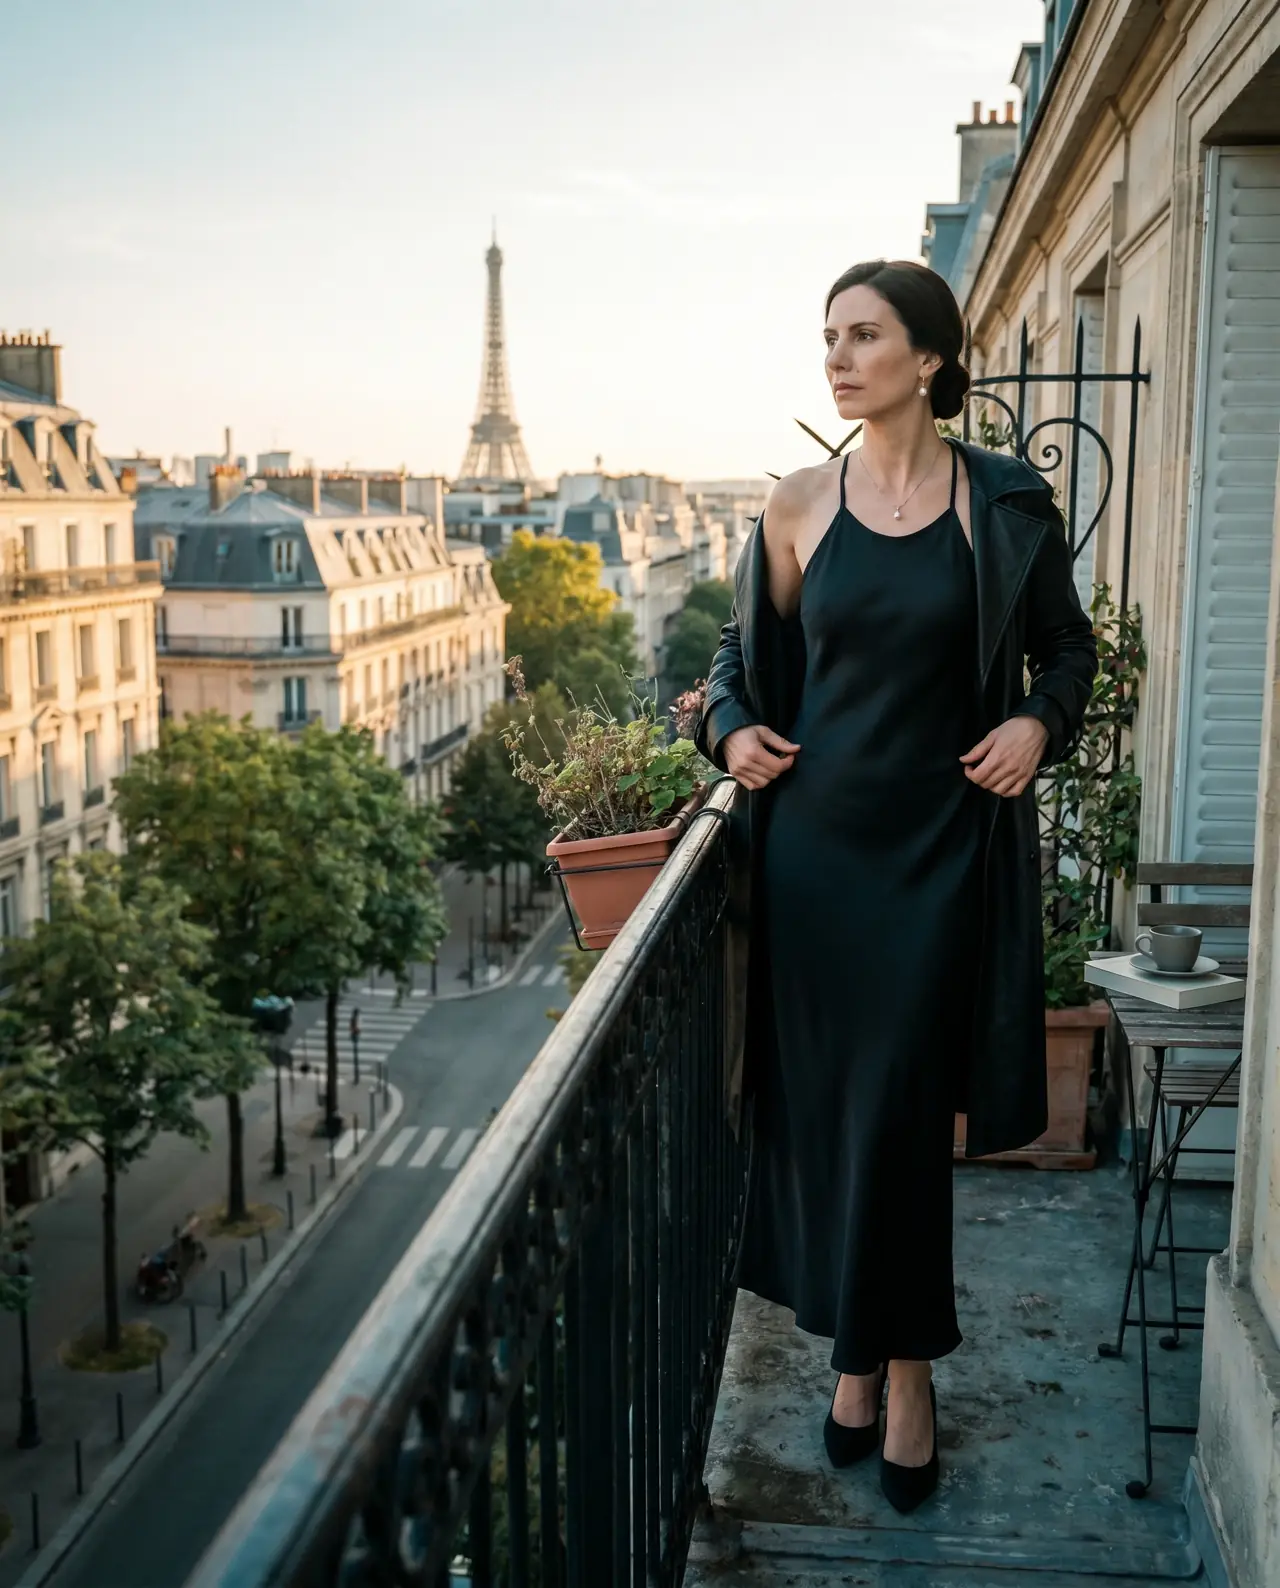
| Cream silk slip dress + camel trench | Formal | Gallery openings, dinner dates |
| Vintage band tee + wide-leg denim | Casual | Coffee runs, weekend errands |
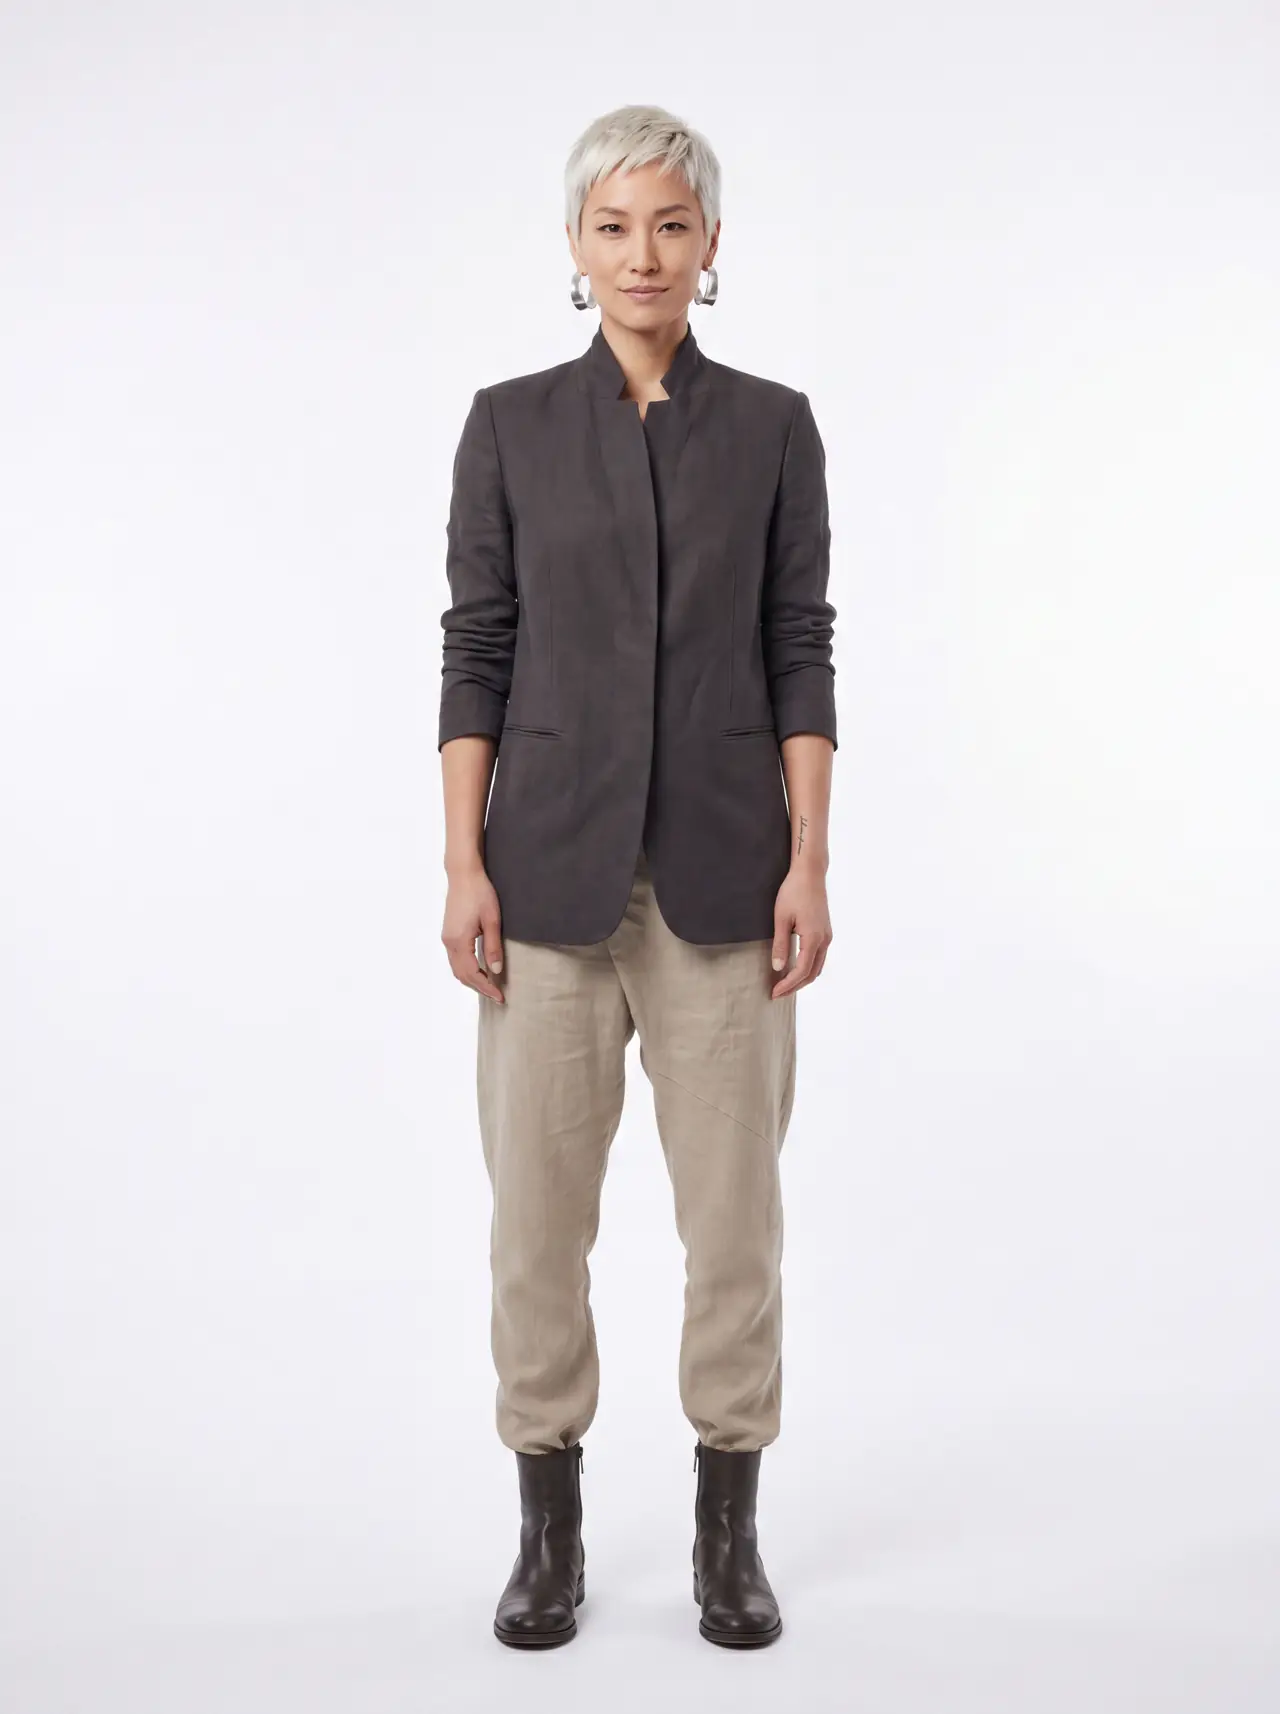
| Black ribbed tank + high-waisted trousers | Business | Studio meetings, podcast tapings |
| Oversized cashmere sweater + bike shorts | Sleepwear/loungewear | At-home content, morning routine |
| Cropped leather moto + slip skirt | Outerwear | Night out, concerts |
| Linen blazer + wide silk scarf | Formal | Travel days, brand events |
Two non-obvious points:
- Name each outfit. "The trench look" beats "outfit 3." Named outfits make it easier to keep references consistent across captions and generations, and make collab briefs writable. ("She wears the trench look for the perfume launch.") Storing each look with a name, description, category, and a list of fitting occasions lets prompts reference a named outfit instead of redescribing it every time.
- Bind outfits to occasions, not to vibes. "Casual" is fine; "casual but make it elevated" is the kind of fuzzy that drifts the model. Occasions ("morning coffee run," "Friday gallery opening") give the scene planner something concrete to anchor on.
Once you have a wardrobe library, every post becomes: pick a venue, pick a wardrobe item, pick a mood, generate. Most of your prompt work is now retrieval, not invention.
Step 4: Set the photography register
Two persona feeds with the same person and the same wardrobe can feel completely different depending on what we call the photography register: the underlying visual grammar of every shot. Get this wrong and the feed feels off in a way you cannot quite name.
The four registers worth knowing:
- Editorial lifestyle. Magazine-polished, deliberately styled, gentle posing. Good for fashion, beauty, luxury. The look says "this was shot for a campaign."
- Magazine editorial. A step harder than editorial lifestyle, professional studio lighting, full styling, model-like poses. Good for high-fashion or hero shots; exhausting as a daily register.
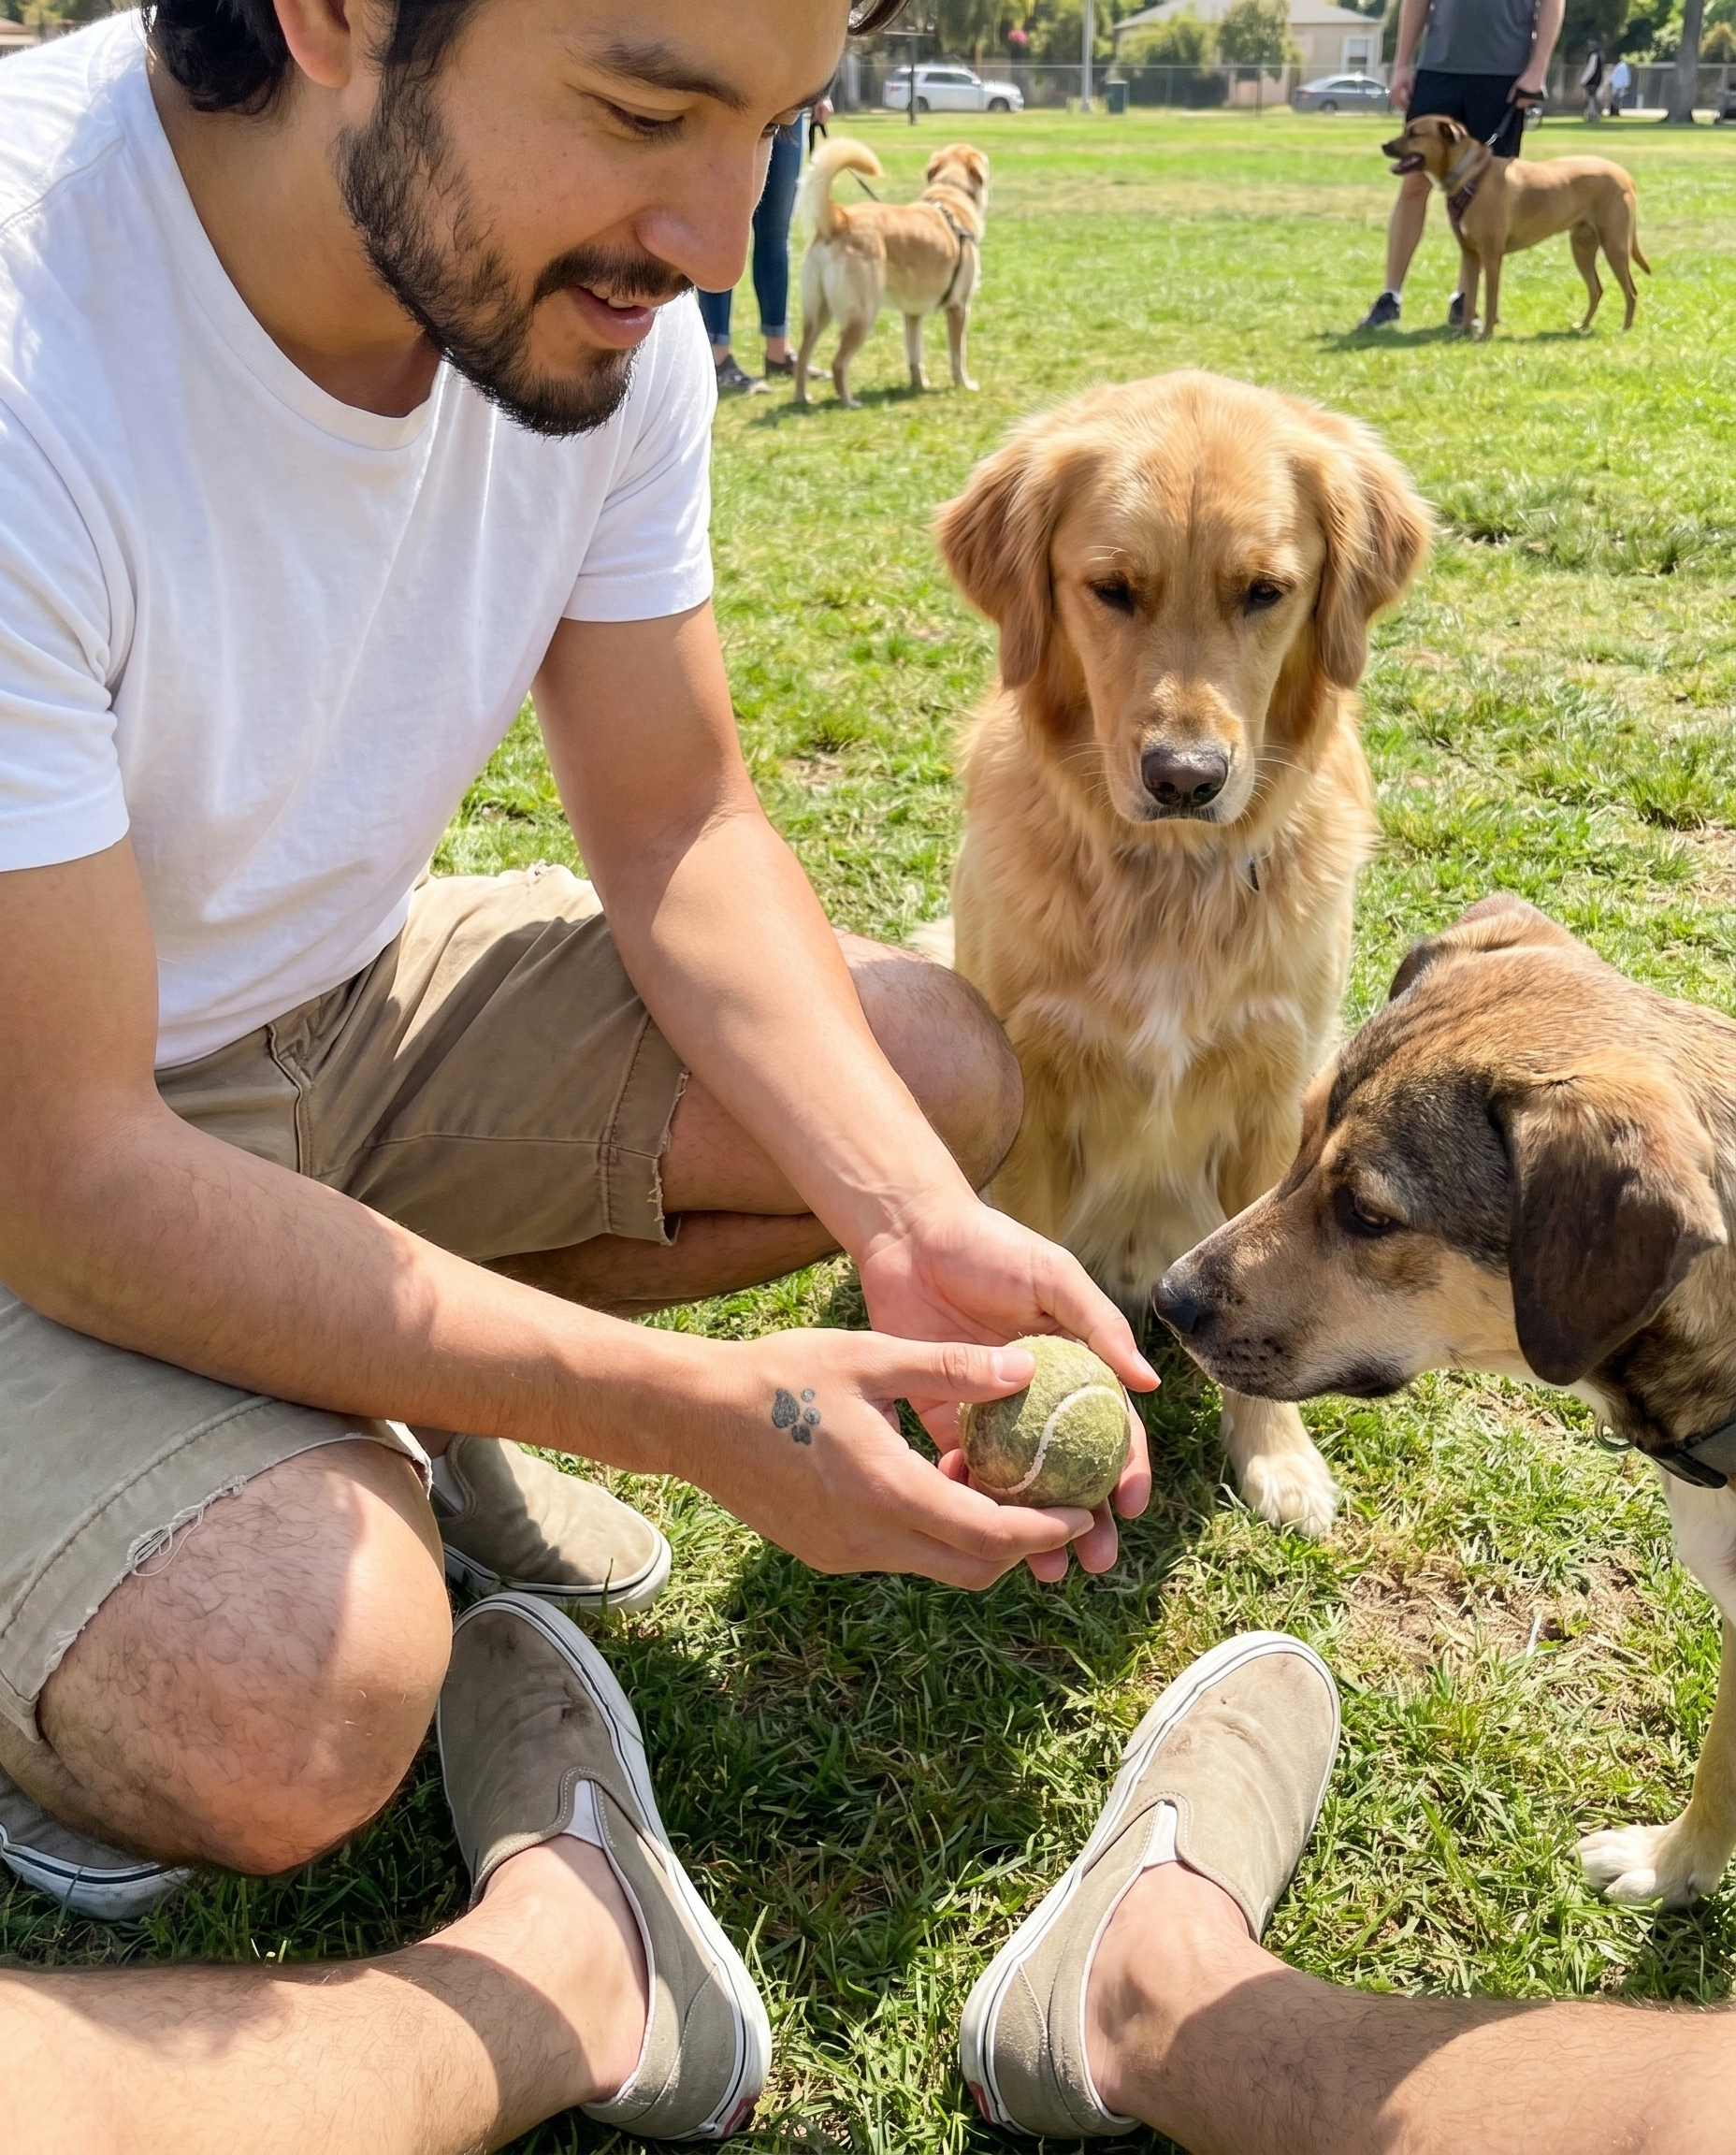
- Candid documentary. Looser, slightly imperfect framing, off-axis eye contact, real-feeling moments. Good for pets, food, travel. The look says "someone caught this."
- Warm snapshot. Closer-cropped, golden-hour-lit, slightly nostalgic. Good for wellness, home, soft lifestyle.
Pick one register per persona and stick with it. Mixing registers in the same feed is the single most common cause of "this feels AI-generated even though the faces are consistent." A real person has a default visual rhythm. A real photographer does too.
If you are not sure which register fits, pull twenty real human creators in your niche, screenshot their feeds, and ask: "Are these mostly posed or mostly caught?" That answer is your register.
Step 5: Establish the writing voice
The feed is half image, half caption, and a great image with the wrong caption is a dead post. The voice should be defined as tightly as the wardrobe.
Three knobs do most of the work:
- Formality. From very casual ("ok these brownies are insane lol") to literary ("Saturday opens with the smell of butter and the long, slow hours of nothing in particular."). Pick a level and audit five sample captions against it.
- Humor level. Dry, playful, earnest, deadpan, none. Note that "none" is a valid setting for some niches (luxury, wellness) and a kiss of death in others (pets, food).
- Emoji usage. Three modes, in practice: zero, sparing (one emoji per caption, semantic), and dense (multiple emoji, decorative). The middle option is hardest to maintain consistently and the most common source of caption drift.
Two extras worth defining up front: signature phrases (a captioning tic the persona uses, like always opening with a one-word line) and forbidden phrases (the corporate buzzwords or AI tells the persona never says). Forbidden phrases tend to do more work than signature ones, because they prevent the generic-AI-caption regression that sneaks in over time.
Write five captions by hand for posts you have not generated yet. If they all sound like the same person wrote them, your voice spec is tight enough. If two of them could have come from any random brand account, tighten.
Step 6: Connect platforms and set a posting cadence
Once the persona has identity, references, wardrobe, register, and voice, you need somewhere for it to live. Three small decisions here have outsized downstream effects:
- Pick one or two platforms, not five. Each platform has a different aspect ratio, caption length, and unwritten rules. A persona that looks great on Instagram often fails on TikTok and LinkedIn because the register is wrong. Master one platform, then port.
- Set a posting cadence you can sustain. For most personas, 4-7 posts a week on the primary platform is the sweet spot, enough to stay in the algorithm, not so much that quality slips. Daily posting is usually a mistake; the marginal post adds noise faster than reach.
- Schedule, do not post live. Use a queue with a 48-72 hour buffer so a bad generation never has to ship under deadline pressure. Reviewing in batches is also significantly faster than reviewing one at a time.
This is where AutoPersonas does most of its work for you, scheduling, multi-platform formatting, and a review queue with auto-QA, but the underlying discipline is platform-agnostic. If you build it yourself, build the queue first.
Step 7: Add a brand goal layer
A persona without a goal is a hobby. A persona with a goal becomes a brand. Once the feed is healthy (typically 4-8 weeks in) layer on a brand goal: a specific outcome the persona is working toward.
Common brand goal patterns we see:
- Product promotion. The persona is the face of a product line. Posts seamlessly weave the product into outfits, routines, or environments.
- Affiliate ambassadorship. The persona is signed to one or two brands and integrates them into the feed without becoming an ad account.
- Collab. The persona partners with another persona (yours or someone else's) for a campaign, swapping features and tagging across feeds.
- Editorial. The persona is the face of a fictional magazine, journal, or studio, and the feed becomes the publication.
The goal layer is where most monetization happens, but the order matters: identity, references, wardrobe, register, voice, cadence, then goal. If you flip that order and start with monetization, the persona inherits the brand's voice instead of having one of its own. Audiences feel the difference even when they cannot articulate it.
Common pitfalls
A short tour of the failure modes we see most often, in roughly the order they appear in a persona's life:
- Face drift. Cheekbones migrate, eyes change color, the chin softens. Almost always caused by an undersized or non-deterministic reference set. Fix: lock the four neutral angles in step 2 and never let production prompts overwrite them.
- Wardrobe chaos. The persona owns 200 outfits and recognizably belongs to none. Fix: cap the wardrobe at six named looks for the first three months. Add the seventh only when an existing one falls out of rotation.
- Over-polished feed. Every shot looks like a perfume ad; the feed feels uncanny. Fix: introduce one "low-key" shot for every three "hero" shots, same persona, same wardrobe, looser register.
- Fake-looking captions. Too many emojis, too many em dashes, "as a [persona type]" preambles, vague pep. Fix: forbidden-phrase list, hand-written captions for the first month, periodic audits.
- Cadence collapse. The persona posts five times the first week and disappears. Fix: build the queue before you launch and pre-generate three weeks of buffer.
- Mixed registers. A magazine-editorial cover shot followed by a candid kitchen snapshot followed by a polished sponsored post. Fix: pick one register, write it down, and bounce anything that does not fit.
- Goal contamination. A brand partnership shows up before the persona has a voice, and the voice never recovers. Fix: no monetization for the first six weeks. None.
None of these are fatal individually. Two or three of them at once kill the persona in week three, which is exactly when most projects die.
Try it free
Building an AI influencer this way (identity, references, wardrobe, register, voice, cadence, goal) is doable by hand. It is also doable in an evening if you have a system that makes each step structured and the next one obvious. AutoPersonas is the fastest path we know of, and the free signup gives you the full pipeline end-to-end, no card required.
If you do nothing else after reading this, do step 1. Write the five fields, age, build, ethnicity, subculture, signifiers, on a single page, and do not let yourself touch a generator until they are tight. The persona that survives is almost always the one whose identity was decided before the first image was made.